Technical Guide
Wooden Framing Specification
A properly built wooden framework is the foundation of every flawless stretch ceiling installation — ensuring the right depth, structural rigidity, and surface quality for a premium finish.
6mm Ply
Ceiling Base
18mm Ply
Side Framing
6 inch (150mm)
Min Frame Depth
White Primer/Paint
Surface Finish
12mm + 12mm Flexible Ply (Vertical)
Curved Framing
Framing Type
Straight Framing (Side Framing)
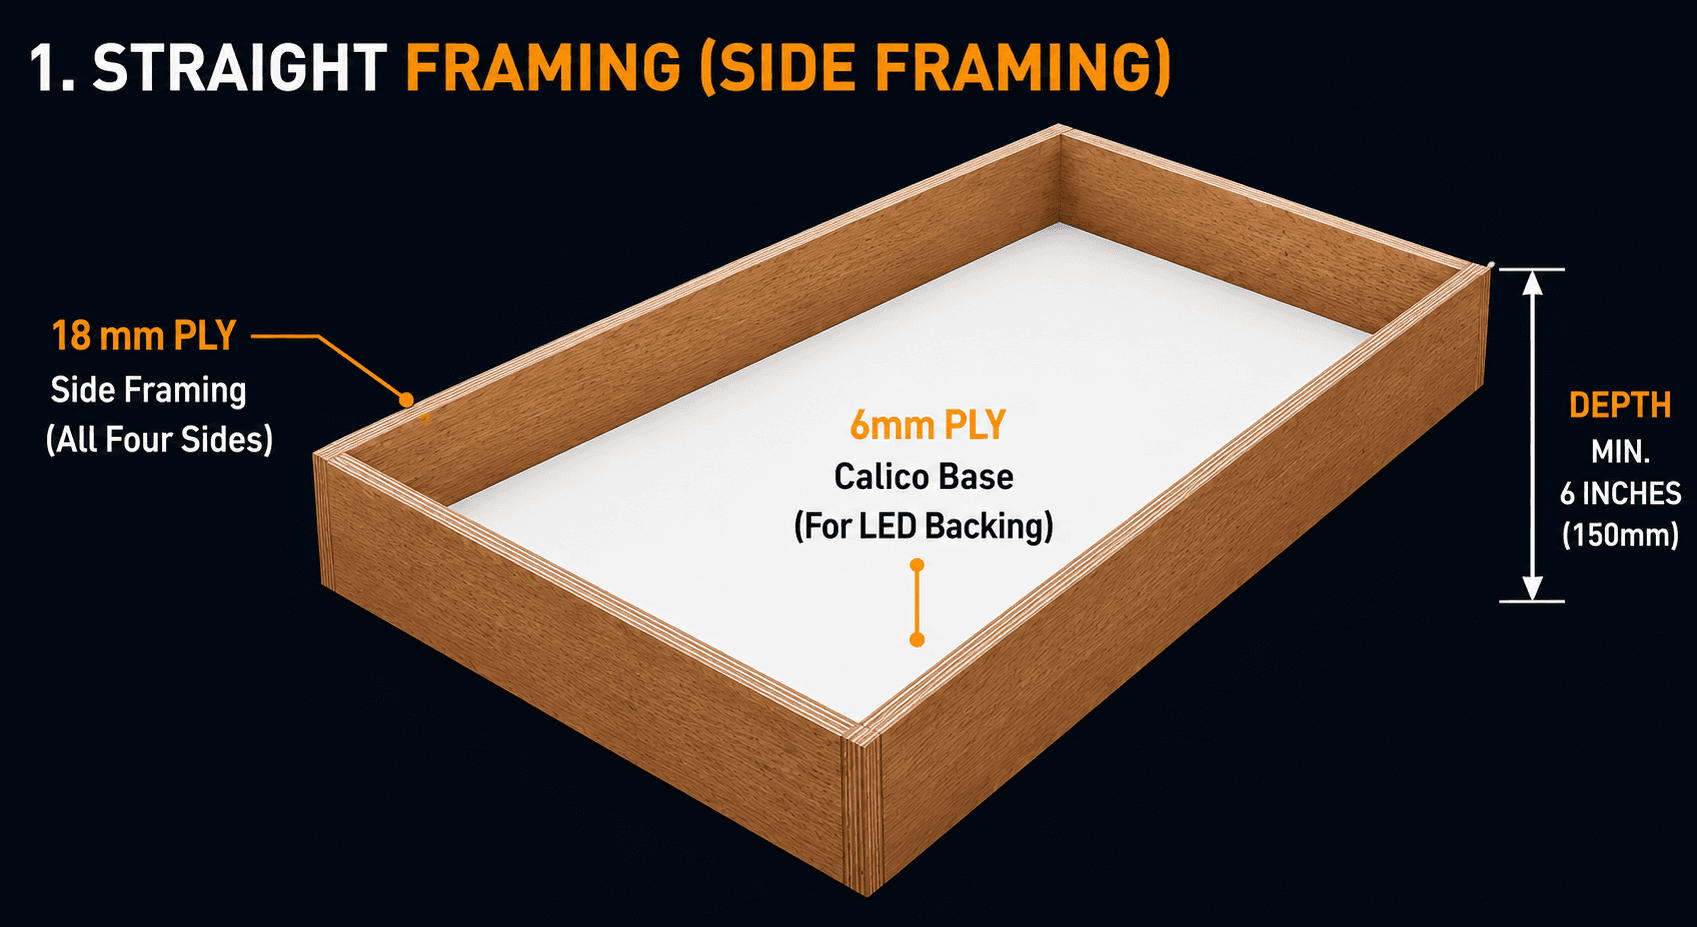
For standard rectangular or square ceiling designs, 18mm plywood is installed vertically along all four sides and fixed to the ceiling structure. A 6mm plywood calico base is fixed to the ceiling surface for LED backing. Minimum frame depth must be maintained at 6 inches (150mm) throughout.
- 18mm Ply fixed vertically on all four sides
- 6mm Ply calico base for LED backing
- Minimum frame depth: 6 inches (150mm)
- Uniform depth all around for level membrane installation
- Suitable for rectangular and square ceiling designs
Side Framing
18mm Ply
All four sides, vertical
Min. Depth
6 inches
150mm minimum
Framing Type
Curved / Circular Framing
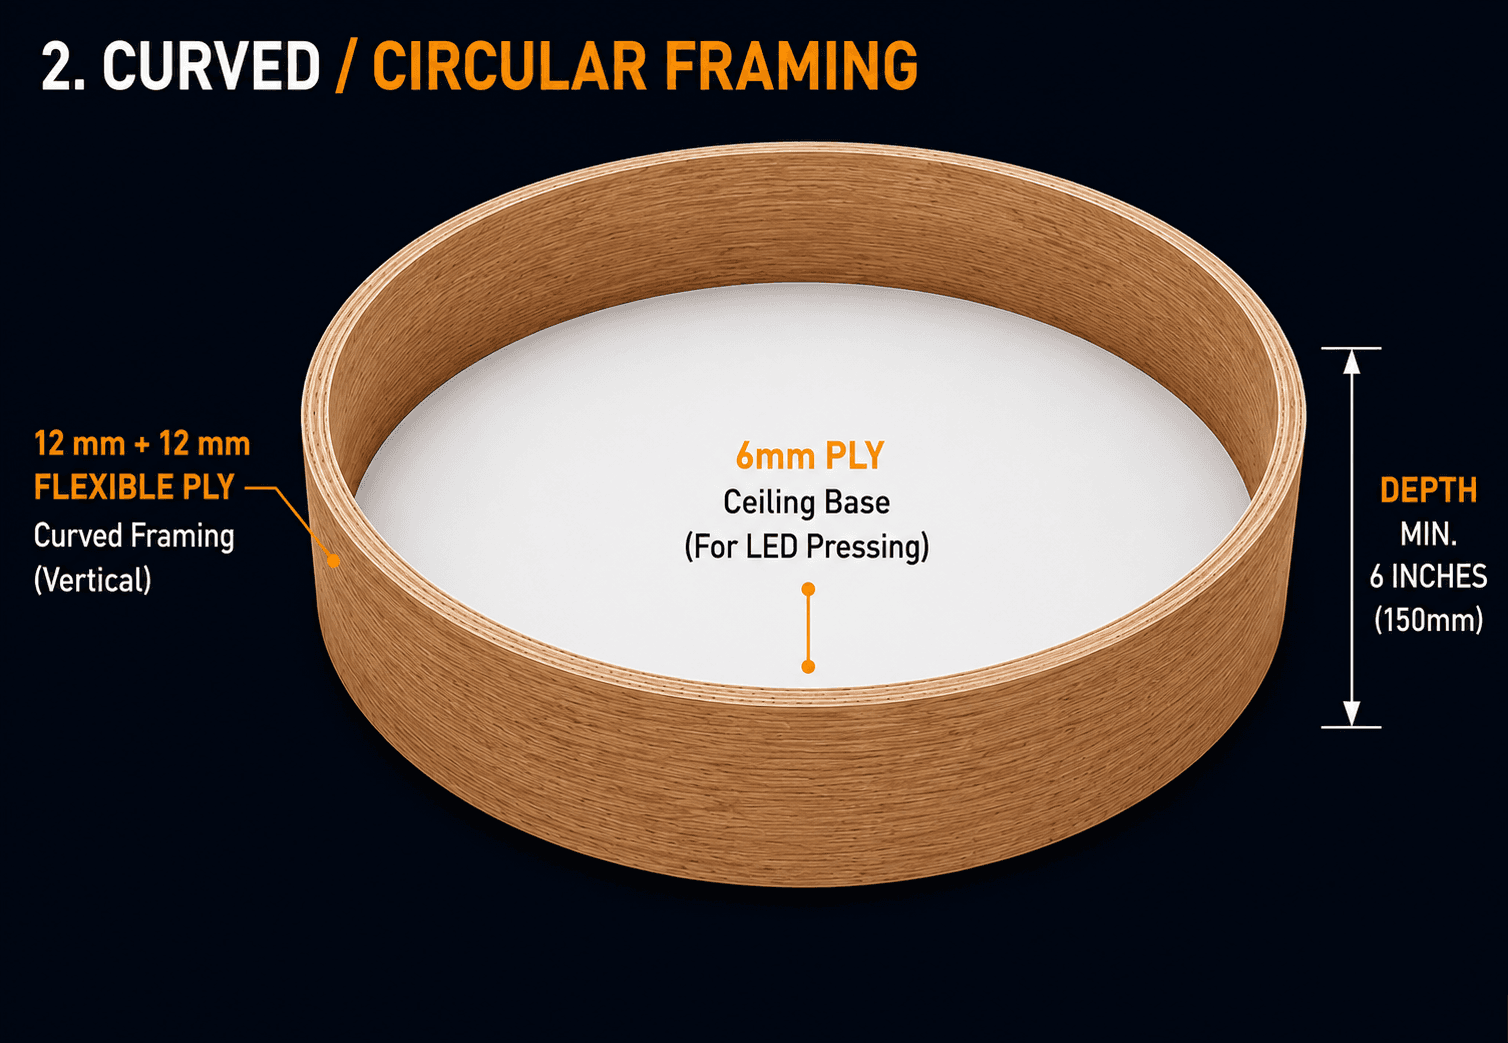
For curved, circular, or custom-shaped designs, 12mm + 12mm flexible plywood (laminated in two layers) is used vertically as the curved side frame. The same 6mm ply ceiling base and minimum 6-inch depth apply. Two laminated layers are mandatory — a single layer lacks the structural rigidity required for a smooth, stable membrane installation.
- 12mm + 12mm Flexible Ply for curved / circular framing (vertical)
- 6mm Ply ceiling base for LED pressing — same as straight
- Minimum depth maintained at 6 inches (150mm)
- Laminated in two layers for structural strength and rigidity
- Single layer not recommended — double layer mandatory
Curved Framing
12mm + 12mm
Laminated flexible plywood, vertical
Min. Depth
6 inches
150mm minimum
Single layer not sufficient — always laminate two layers (12mm + 12mm or 8mm + 8mm) for structural rigidity.
Completing the Build
Surface Finish & Installation
White Primer / White Paint
Surface Finishing
Once the wooden framework is complete, all internal surfaces are finished with white primer or white paint. The reflective surface maximises LED light distribution for a brighter, cleaner ceiling.
White Primer / White Paint — maximises LED reflection
Final Step
Stretch Ceiling Installation
With framing, lighting, and finishing done, the stretch ceiling membrane is installed using the appropriate profile system — creating a perfectly smooth, seamless, and luxurious ceiling finish.
Ready to Build
Start Your Project Today
Our team ensures every framework meets these exact specifications for a flawless, long-lasting stretch ceiling.